Why Building Your Own Teak Outdoor Sofa Makes Perfect Sense
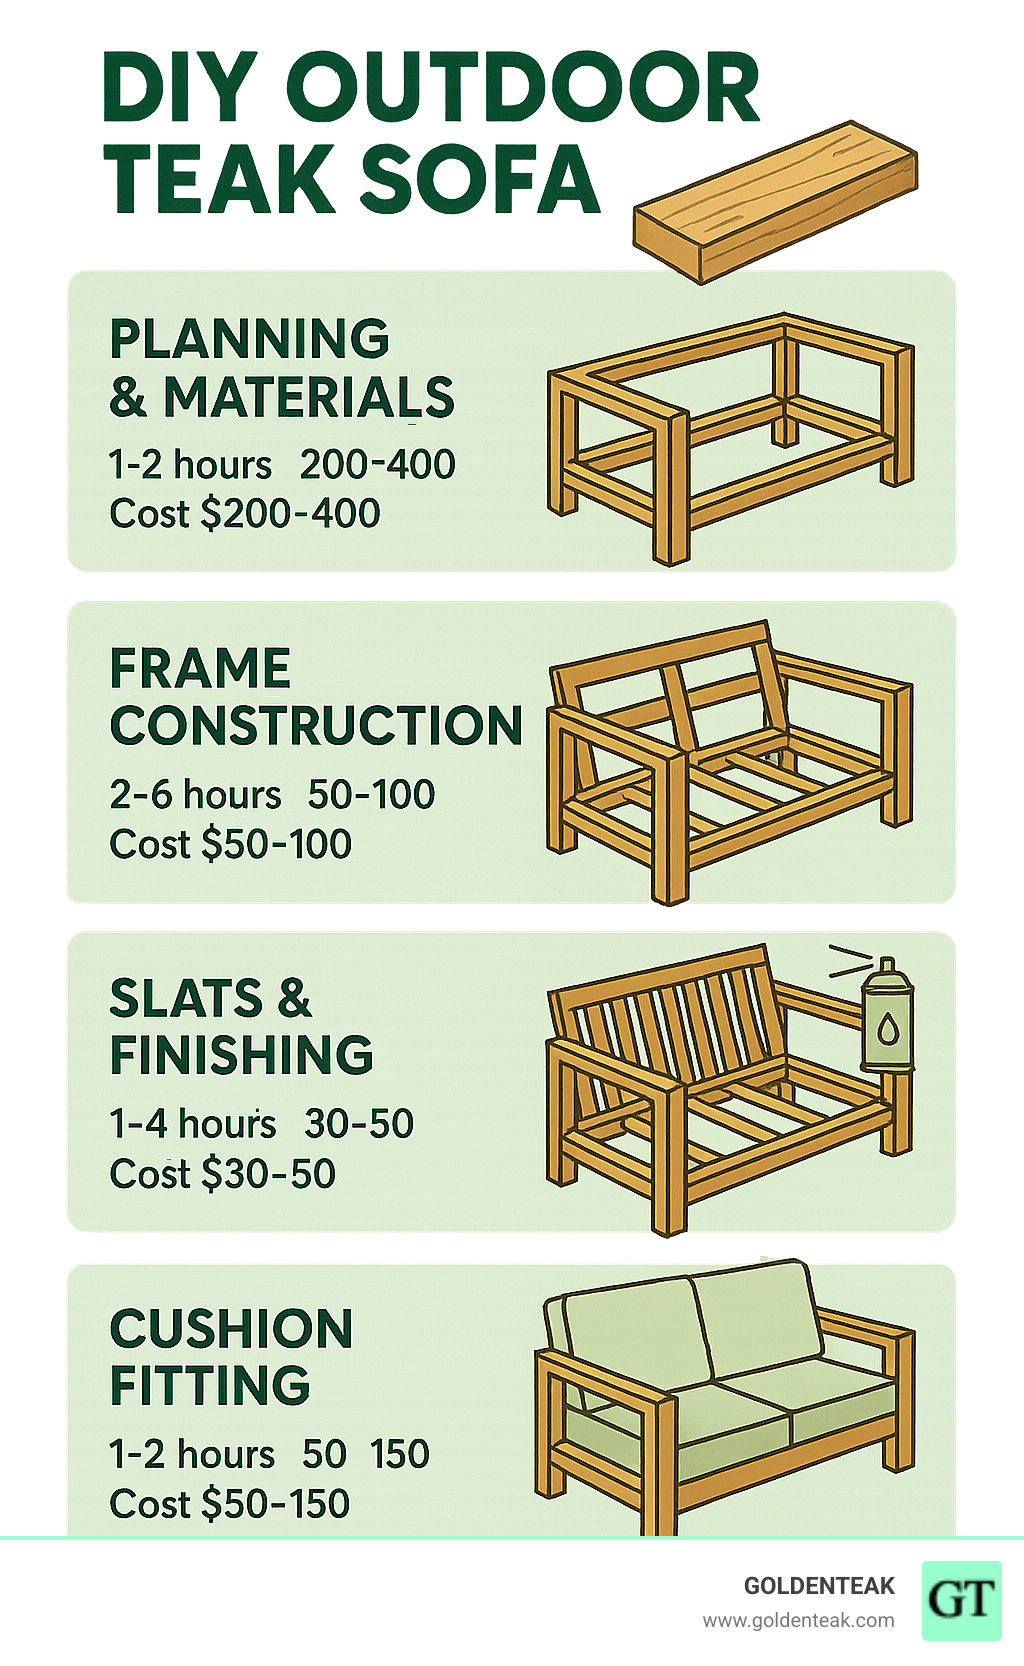
A diy outdoor teak sofa project can save you 50-75% compared to buying retail while giving you complete control over design and quality. Here’s what you need to know:
Quick Build Overview:
- Time Required: 4-20 hours depending on experience level
- Cost Range: $200-$700 vs $1,300-$6,000 retail – Try GOLDENTEAK for a good price and Made in USA Sunbrella Cushions.
- Primary Tools: Miter saw, drill/driver, pocket hole jig, sander
- Key Materials: Grade-A teak lumber (hard to find) , exterior screws, spar urethane finish
- Best Feature: 25+ year lifespan with minimal maintenance
As one DIY builder shared: “I was on the hunt for a modern looking outdoor patio set and as with most DIYs the price tags were giving me no option but to make my own!” This sentiment captures exactly why so many homeowners are taking teak matters into their own hands.
Outdoor living spaces have become essential extensions of our homes, and quality teak furniture delivers best durability against weather, insects, and daily use. Unlike pine or cedar alternatives, teak’s natural oils provide built-in protection that actually improves with age.
The beauty of a DIY approach lies in customization – you can build exactly the size, style, and comfort level your space demands. Whether you’re creating a cozy two-seater or an expansive sectional, teak responds beautifully to both power tools and hand finishing.
I’m Elsa Rao, President of GOLDENTEAK since 1996, and I’ve helped thousands of customers understand what makes quality teak furniture last decades outdoors. Throughout this guide, I’ll share the same techniques and standards we use for our premium diy outdoor teak sofa projects to ensure your build delivers professional results.
Why Teak Is the Gold Standard for Outdoor DIY Furniture
When you’re planning a diy outdoor teak sofa, understanding why teak dominates the outdoor furniture world makes all the difference. This remarkable wood has earned its reputation through decades of proven performance in the harshest weather conditions.
Teak’s superpower lies in its natural weather resistance, thanks to oils that are woven right into the wood fibers. Unlike surface treatments that wear away, these oils work from the inside out, actively repelling water and preventing rot. The same oils that make teak feel slightly waxy to the touch also discourage insects – no chemical treatments needed.
The numbers tell the story clearly. A well-built teak outdoor sofa can easily last 25 years or more with minimal maintenance. Compare that to treated pine lasting 2-5 years, and you start to see why teak makes financial sense despite the higher upfront cost.
What really sets teak apart is how it ages. While other woods simply deteriorate over time, teak develops an attractive silver-gray patina that many homeowners actually prefer to the original golden color. This weathering is purely cosmetic – underneath, the wood structure remains as strong as ever.
Material Comparison:
| Wood Type | Lifespan | Weather Resistance | Maintenance | Cost |
|---|---|---|---|---|
| Grade-A Teak | 25+ years | Excellent | Minimal | High |
| Cedar | 5-10 years | Good | Moderate | Medium |
| Pine (Treated) | 2-5 years | Fair | High | Low |
Sustainability matters too. Grade-A teak comes from responsibly managed plantations, making it an environmentally conscious choice. When you’re investing time in a DIY project, knowing your materials are both durable and sustainable adds satisfaction to every cut and joint.
Benefits of a diy outdoor teak sofa
Building your own teak sofa opens up advantages that become more apparent with each passing season. The rot-proof nature means you’ll never worry about structural weakness developing in hidden areas. Bug resistance eliminates the need for ongoing chemical treatments that can be harmful around children and pets.
Teak’s excellent strength-to-weight ratio creates furniture that feels substantial without being back-breaking to move. This balance is especially important for outdoor pieces that occasionally need repositioning for cleaning or seasonal storage.
The long-term value proposition becomes clear when you consider replacement costs. While cedar or pine furniture might need replacing every few years, your teak sofa will likely outlast your current patio setup.
Perhaps most satisfying is the low maintenance reality. Annual cleaning and optional oiling is typically all that’s required to keep your diy outdoor teak sofa looking great. No staining, no sealing, no constant worry about weather damage.
Cost Comparison: Build vs. Buy
The financial case for DIY becomes compelling when you examine today’s retail prices. Quality teak outdoor sofas range from $1,300 for basic models to over $6,000 for premium designs. Building your own typically costs between $200-$700, delivering savings of 50-75%.
Here’s how the numbers break down for a typical project. Lumber costs run $150-$400 for Grade-A teak boards, depending on your sofa size and design complexity. Hardware and finish add another $30-$80 for exterior screws, waterproof glue, and spar urethane.
Cushions often represent the largest expense – up to 65% of your total project cost at $160-$530. One DIY builder shared that completing two sofas cost approximately $800 total, with $530 going to cushions alone. This means the actual woodworking portion cost just $270 for both pieces – remarkable value for furniture built to last decades.
The savings become even more dramatic when you consider customization value. Retail teak sofas come in standard sizes that might not fit your space perfectly. Building your own means getting exactly the dimensions, arm height, and seating depth that works for your family and patio layout.
Planning Your Build
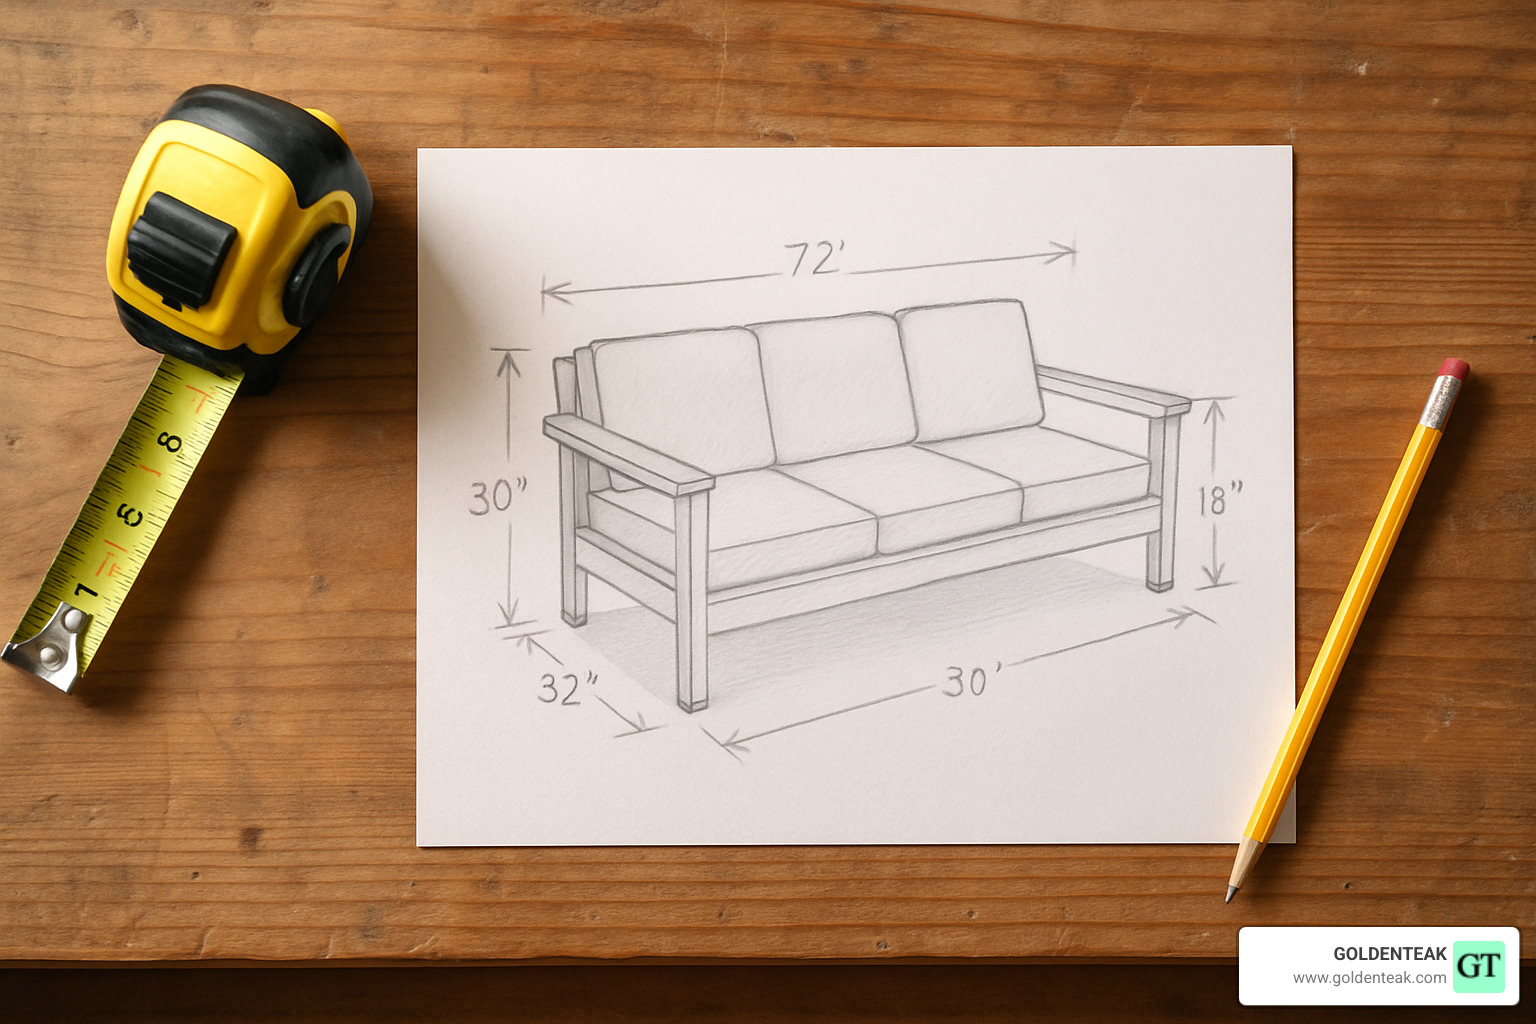
Here’s where the magic happens – turning your diy outdoor teak sofa dream into a detailed plan that sets you up for success. Think of this phase as your roadmap; skip it, and you’ll likely find yourself making expensive trips back to the lumber yard.
Start by measuring your outdoor space carefully. I can’t tell you how many builders get excited and start cutting, only to realize their beautiful sofa won’t fit through the patio door! Measure twice, cut once isn’t just a saying – it’s your wallet’s best friend.
Seating capacity comes down to simple math: allow 24-26 inches of width per person. A three-seater needs roughly 72-78 inches of length, but armrests will add to the overall footprint. If you’re tight on space, consider an armless design that maximizes seating.
The devil is in the details when it comes to cushion sizing. Standard outdoor cushions are advertised as 24-25 inches square, but here’s a pro tip from our showroom experience: actual cushions often measure 23.5 inches to account for fabric seams and stuffing. Always measure your actual cushions before finalizing your frame dimensions, and add a half-inch tolerance to avoid that frustrating “almost fits” situation.
Ergonomic comfort makes the difference between a sofa you love and one that collects dust. Plan for a seat height of 12-13 inches before cushions – this puts most adults at the perfect height once you add 4-5 inches of cushion thickness. The back should angle 10-15 degrees from vertical. Trust me, that slight recline transforms comfort levels dramatically.
For joinery choices, you have two excellent options. Pocket-hole screws offer speed and reliability for beginners, while mortise-and-tenon joints provide the ultimate in long-term strength. Both work beautifully with teak’s dense grain structure, so choose based on your skill level and available time.
Don’t forget about drainage gaps – quarter-inch spaces between slats prevent water from pooling and keep your teak happy for decades. It’s one of those small details that makes a huge difference in durability.
Material & Tool Checklist
Getting your materials and tools organized upfront saves countless headaches later. For Grade-A teak boards, you’ll need different dimensions for different parts of your frame. The legs and armrests require sturdy 4×4 posts, while 2×4 boards handle the frame rails and structural supports beautifully. Those neat 1×4 slats create your seat and back surfaces.
Exterior screws in 2.5-inch and 4-inch lengths handle different joint requirements, while waterproof glue adds extra insurance in critical connections. The finish is crucial – spar urethane provides excellent protection, though some builders prefer teak oil for a more natural look.
Your pocket-hole jig becomes your best friend for strong, hidden joints. A quality random orbit sander makes finishing work much easier, and you’ll need bar clamps to hold everything square while fasteners set. Don’t skimp on safety gear – glasses, hearing protection, and a dust mask are non-negotiable when working with power tools.
Reclaimed teak offers character and potential cost savings, but inspect it carefully. Look for structural soundness and check for old fastener holes that might compromise strength. Sometimes that weathered patina comes with hidden surprises.
Customizing to Your Space & Style
This is where your diy outdoor teak sofa becomes truly yours. Module widths can be adjusted by changing the number of seat slats and overall frame length. Building in 24-inch modules gives you flexibility to create different seating arrangements later.
Arm height dramatically affects both comfort and appearance. Standard arms measure 24-26 inches from the ground, but taller family members might appreciate 28-30 inches. The beauty of DIY is making it perfect for your household.
Modern designs emphasize clean lines and minimal ornamentation, while sectional approaches let you create modular pieces that adapt as your needs change. Some builders start with a basic sofa, then add matching tables or additional sections as their confidence grows.
The back angle can be fine-tuned from 10 degrees for more upright seating to 15 degrees for serious relaxation. Consider how you’ll use the space – conversation areas might benefit from more upright positioning, while lounging spaces call for that deeper recline.
Step-by-Step Build Guide: diy outdoor teak sofa
With your planning complete and materials gathered, you’re ready to transform those beautiful teak boards into a diy outdoor teak sofa that will grace your patio for decades. The key to success lies in taking your time and following a methodical approach – rushing leads to mistakes that can be costly with premium teak lumber.
Start by laying out all your frame components in your workspace. Double-check every measurement against your plans. I’ve seen too many builders find a cutting error after they’ve already started assembly, and believe me, that’s a frustrating moment you want to avoid.
The foundation of any sturdy outdoor sofa begins with the side assemblies. These establish your sofa’s overall proportions and structural integrity. Each side frame consists of front and back legs connected by armrests and seat rails. Getting these assemblies square and identical is crucial – any discrepancies here will haunt you throughout the rest of the build.
diy outdoor teak sofa Frame Construction
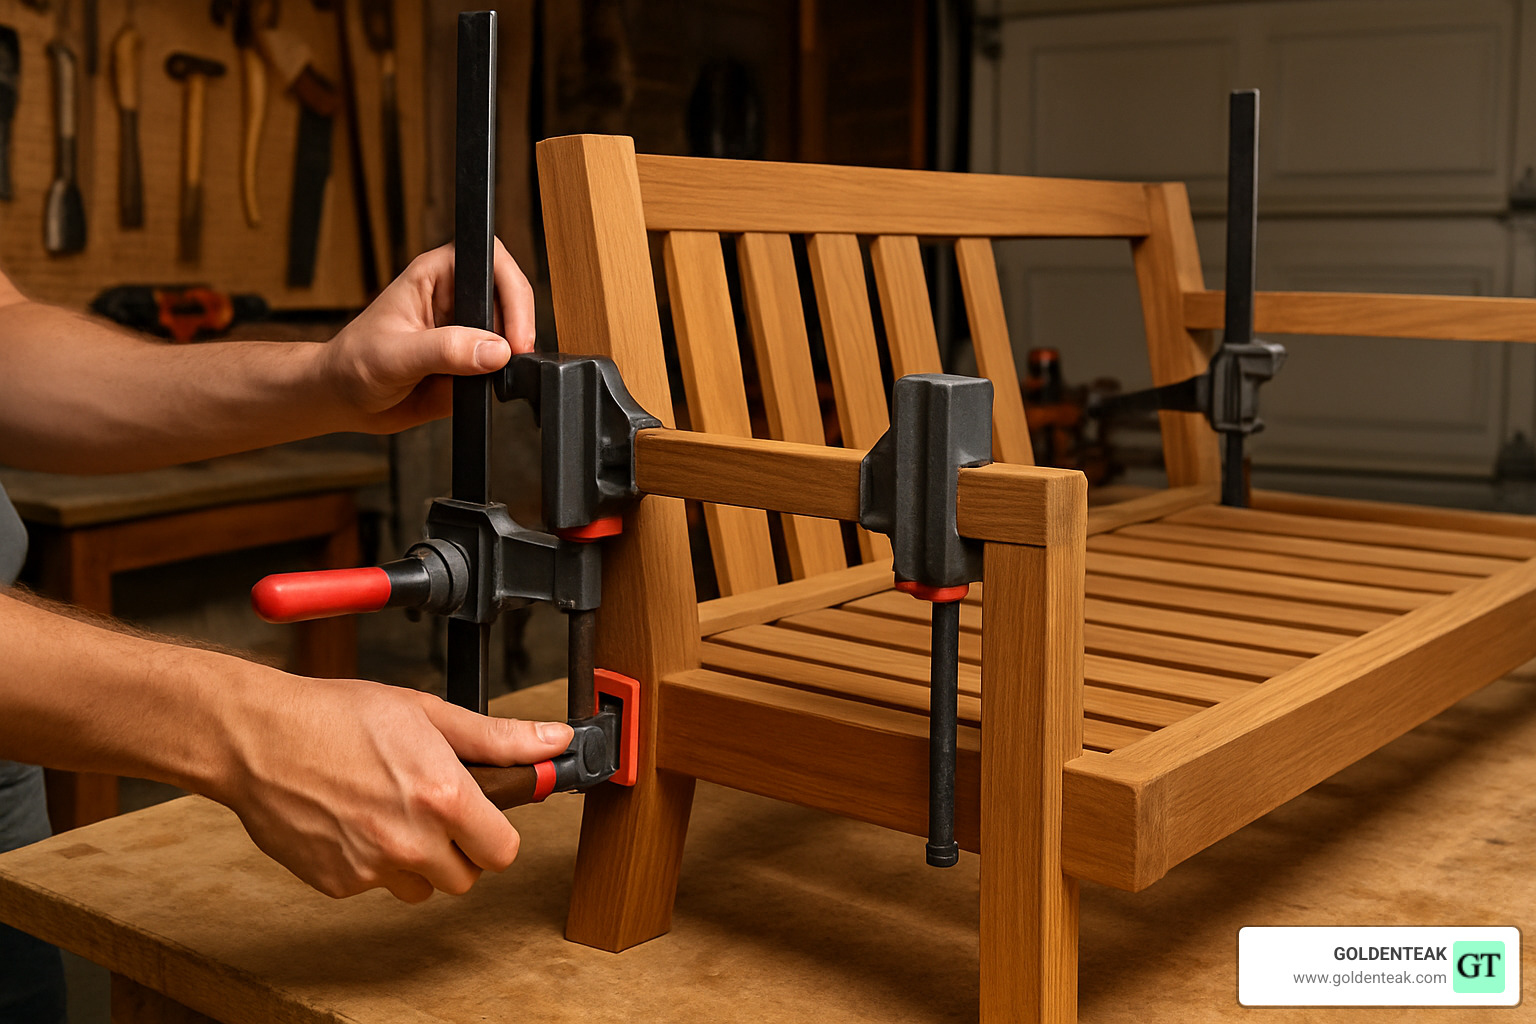
Begin by cutting all your frame components to length using a sharp miter saw blade designed for hardwood. Teak’s incredible density means you need clean, precise cuts to prevent that dreaded tear-out that can ruin a beautiful piece of lumber. Here’s a pro tip: use a stop block for repetitive cuts to ensure every piece is exactly the same length.
For your side frame assembly, you’ll cut 4×4 legs to 29.5 inches for the front and 31.25 inches for the back. The armrests come from 4×4 stock with ends mitered at 45 degrees for a clean, professional look. This is where your pocket-hole jig becomes invaluable – drill those holes on the inside faces where they’ll be completely hidden once assembled.
Never skip the waterproof glue step before assembly. Even though teak naturally resists moisture, the glue adds significant strength to your joints and helps prevent any future squeaking. Apply the glue, then secure everything with 4-inch exterior screws through your pocket holes. Bar clamps are essential here – they maintain that perfect square alignment while your screws set.
Here’s something I learned the hard way early in my teak furniture career: always pre-drill pilot holes slightly smaller than your screw diameter. Teak’s density can cause splitting if you drive screws without pilots, especially near board ends. Trust me, taking this extra step prevents the heartbreak of splitting a expensive piece of teak.
Once your side assemblies are rock-solid, connect them with front and back rails. The front rail carries the weight of people sitting, while the back rail provides mounting for your backrest slats. For sofas longer than 60 inches, install a center support beam – this prevents sagging over time and maintains that sturdy feel that makes teak furniture so satisfying to use.
Cutting & Installing Seat and Back Slats
Installing slats requires patience, but the results are worth every minute you invest. Cut all slats to identical lengths first, then sand each piece through 220 grit before installation. This approach is infinitely easier than trying to sand assembled pieces later when you’re working around joints and corners.
The secret to professional-looking slat installation is using scrap wood as spacers. A 1/4-inch gap between slats allows proper drainage while maintaining comfort – crucial for outdoor furniture that needs to shed rainwater quickly. Start with your center slat and work outward, checking alignment frequently as you go.
Mark your slat positions on the support rails before you start. Pre-drill pilot holes at each mounting point, then apply small amounts of glue to prevent future squeaking. Secure each slat with 2.5-inch screws at both ends, making sure the slats stay parallel as you progress.
For the backrest, angle your mounting rail to create that comfortable recline angle. Most builders find 12-15 degrees ideal for relaxation without feeling like you’re sliding backward. This subtle angle makes the difference between a sofa that’s merely functional and one that invites you to linger with your morning coffee.
Weatherproof Finishing for Teak
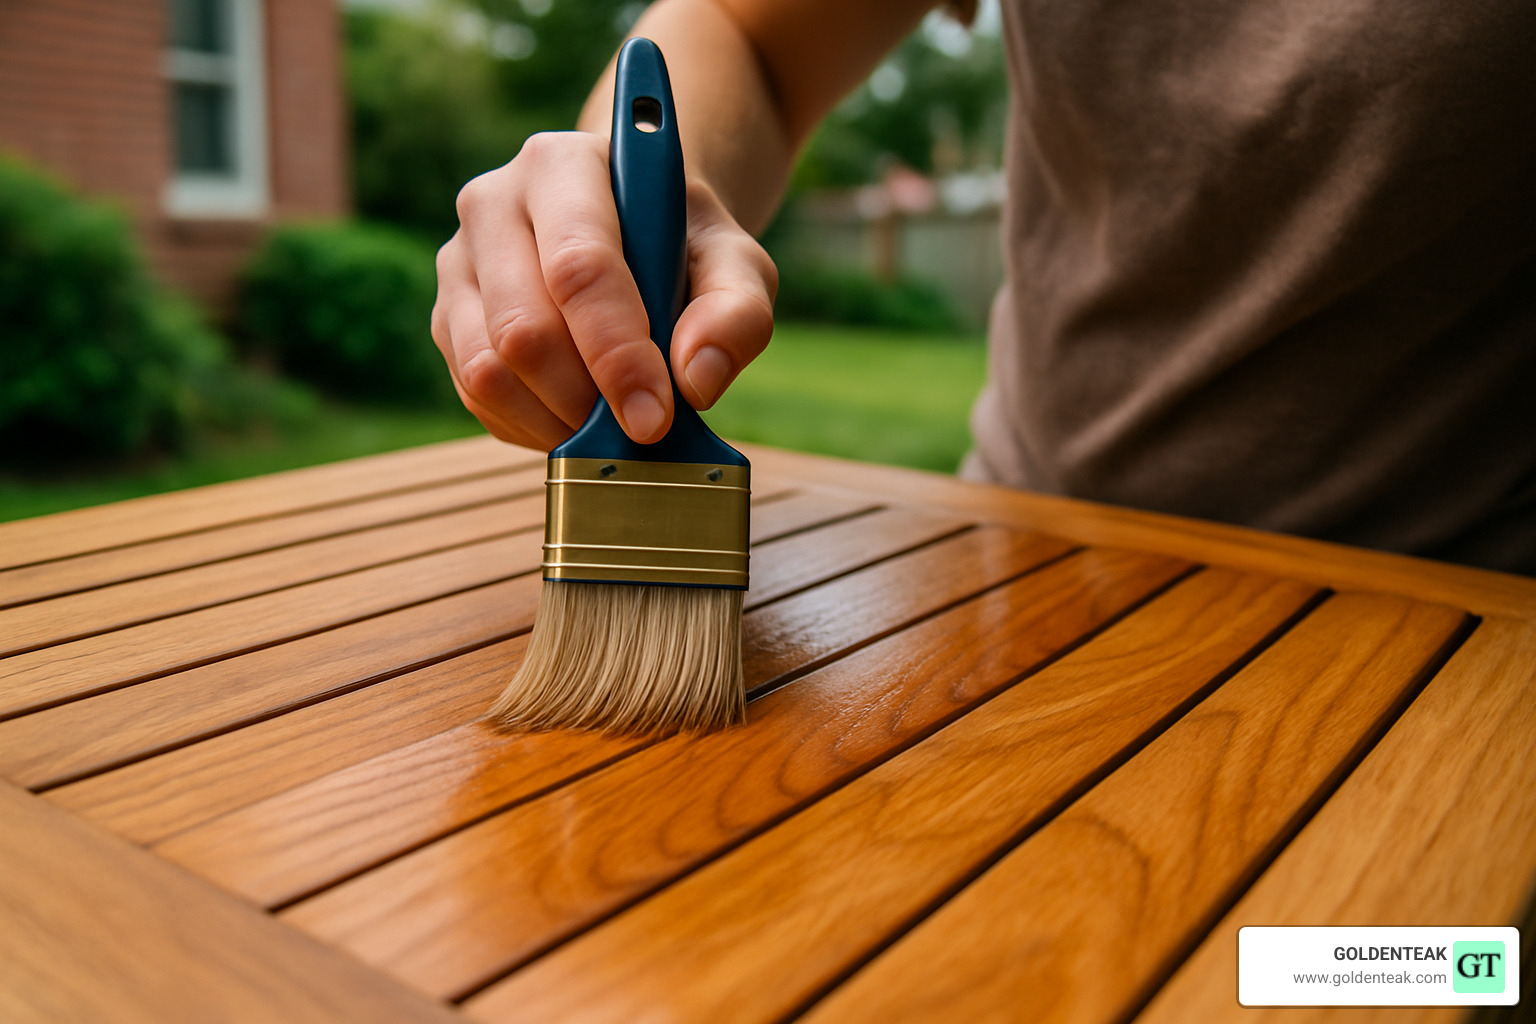
Proper finishing protects your investment and brings out teak’s natural beauty. Start with light sanding using 180-grit paper to smooth any rough spots and open the grain for finish penetration. If you’re working with reclaimed teak, use a teak cleaner first to remove that gray patina and reveal the gorgeous fresh wood underneath.
You have several finishing options for your diy outdoor teak sofa. Natural weathering allows teak to develop its signature silver-gray patina with no maintenance required. Teak oil maintains that golden honey color but needs annual reapplication. Spar urethane provides maximum protection with a 3-4 year reapplication cycle.
If you choose to apply finish, thin, even coats work better than trying to build thickness quickly. Sand lightly between coats with 220-grit paper, then remove every speck of dust with a tack cloth. This attention to detail separates amateur work from professional results.
Work in shade and avoid direct sunlight during application. Maintain a wet edge to prevent lap marks, and allow full cure time between coats – typically 24 hours. Apply extra coats to end grain and areas prone to water contact like armrest tops and seat edges.
Fitting Cushions & Hardware
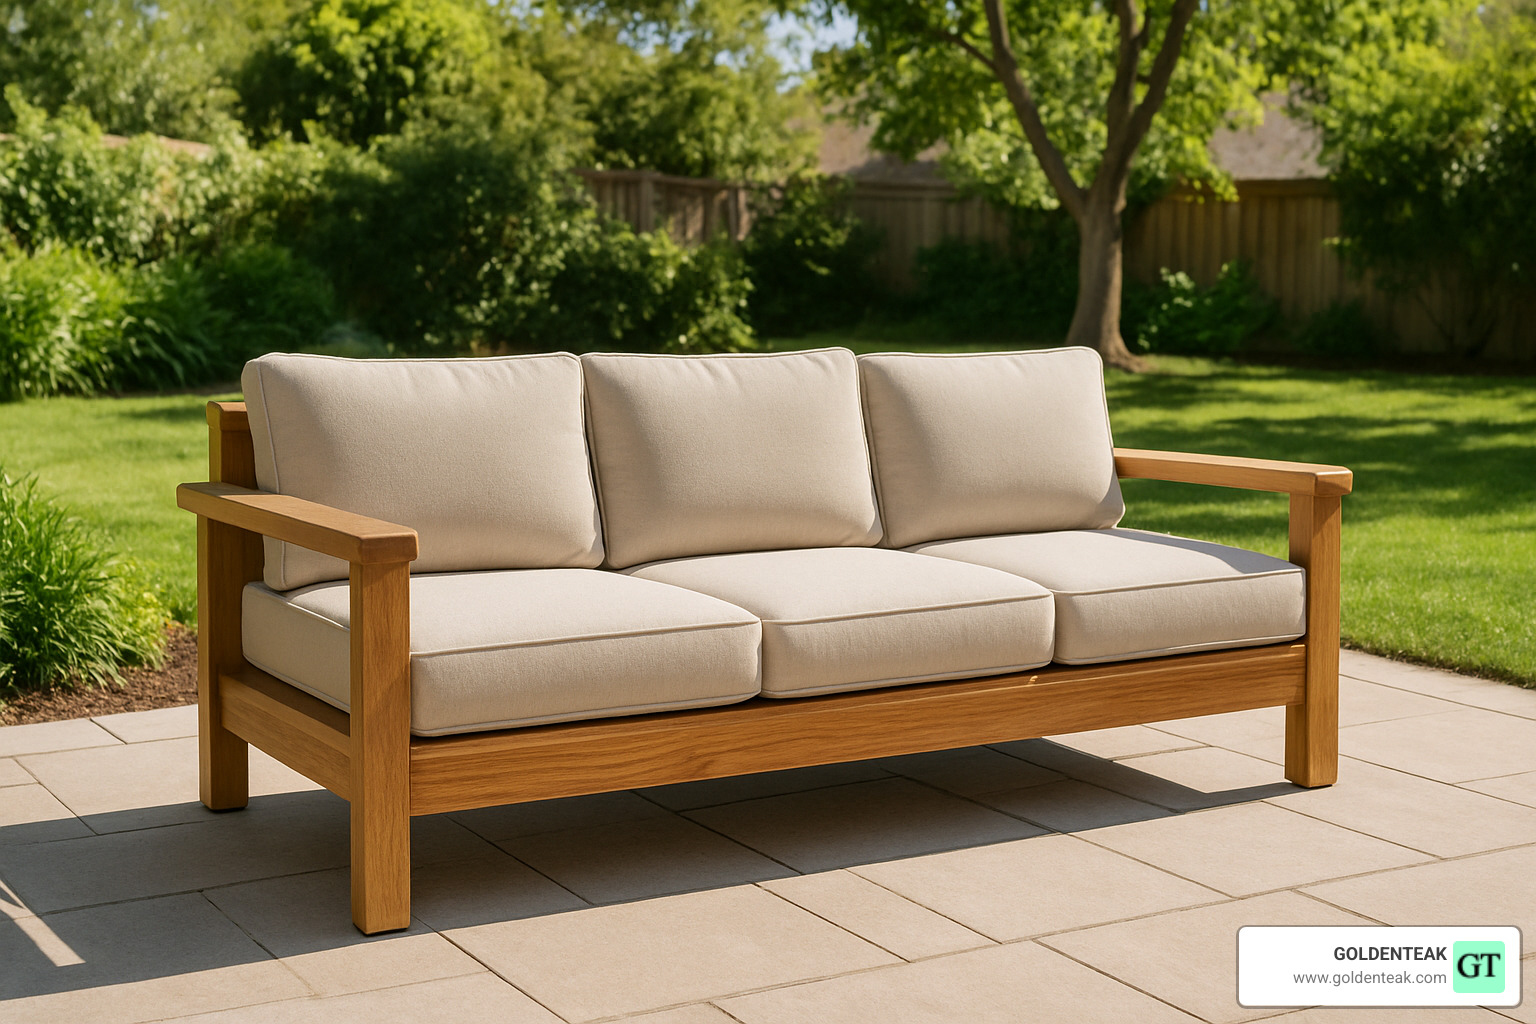
This final step brings your entire project together. Measure your actual cushions carefully – those advertised 24-inch cushions often measure 23.5 inches to account for fabric thickness. Build your frame opening about 1/2 inch undersized (roughly 70.5 inches for three 24-inch cushions) to eliminate unsightly gaps.
Add rubber feet or adjustable levelers for uneven surfaces – most patios aren’t perfectly level. If your deck experiences strong winds, consider tie-down loops to keep cushions secure. For sectional designs, corner brackets provide solid connections between pieces.
Test-fit everything before final assembly. Making adjustments now is much easier than after the finish is applied and everything looks perfect. Take photos during assembly too – they’ll be invaluable if you ever need to disassemble for moving or repairs.
The moment you set those cushions in place and step back to admire your completed diy outdoor teak sofa, you’ll understand why so many people choose to build their own. You’ve created something that will serve your family beautifully for decades while saving thousands compared to retail prices.
Ensuring Durability & Safety Outdoors
Building a diy outdoor teak sofa that lasts decades requires thinking beyond just assembly – you’re creating furniture that needs to withstand whatever nature throws at it. Temperature swings, driving rain, UV rays, and wind loads all test every joint and fastener you’ve installed.
The good news? Teak loves a challenge, but it needs your help through smart construction choices.
Load-bearing strength starts with the right hardware. Never compromise on fasteners for outdoor furniture. Stainless steel or specially coated screws resist corrosion that can weaken joints over time. Regular steel screws might save a few dollars upfront, but they’ll cost you much more when your sofa starts wobbling after two seasons.
Waterproof glue in every mortise and tenon joint creates a bond that actually strengthens as it ages. For larger sofas over six feet long, diagonal bracing in the corners prevents the frame from racking when someone plops down heavily on one end.
If you live near the coast, upgrade to marine-grade hardware. Salt air is particularly aggressive, and the small extra cost pays dividends in longevity.
Safety during construction deserves serious attention. Teak dust can irritate your respiratory system – especially during extended sanding sessions. A quality dust mask isn’t optional equipment. Safety glasses protect against wood chips, and hearing protection matters during long cutting sessions.
Keep your work surface stable and well-lit. Take breaks when you’re tired – that’s when accidents happen.
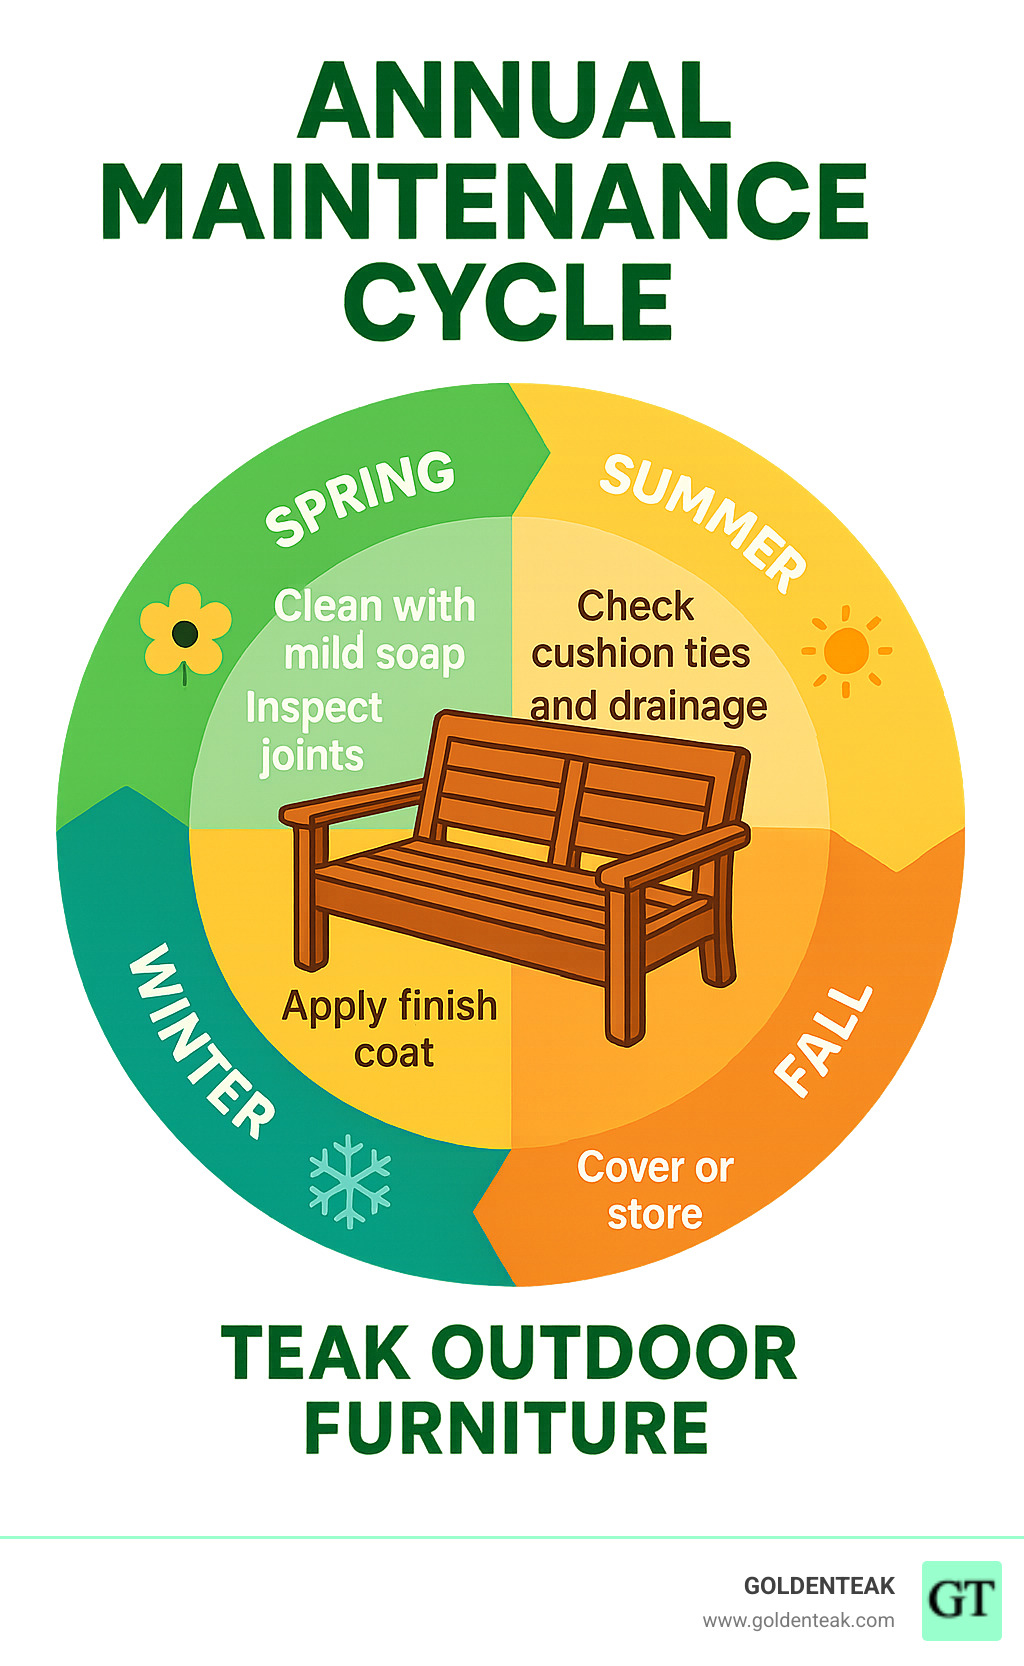
Your seasonal maintenance routine determines how long your sofa looks and performs like new. Spring cleaning with mild soap and water removes winter grime while giving you a chance to inspect all joints. Summer’s heat and UV exposure can dry out finishes, so check for any areas needing touch-ups.
Fall preparation includes applying fresh finish coats if needed. Winter protection varies by climate, but at minimum, store cushions indoors and consider covers during harsh weather.
The beauty of quality construction is that maintenance becomes simple routine care rather than emergency repairs. A well-built diy outdoor teak sofa rewards your careful attention with decades of comfortable outdoor living.
Frequently Asked Questions about DIY Teak Outdoor Sofas
Building your first diy outdoor teak sofa naturally raises questions. After helping thousands of customers understand teak furniture over the years, I’ve found these three questions come up most often. Let me share what I’ve learned from both professional builders and enthusiastic DIYers.
How much teak will I need for a 3-seat sofa?
Planning your lumber order correctly saves both money and frustration. A typical 3-seat diy outdoor teak sofa requires approximately 40-50 board feet of Grade-A teak lumber.
Here’s how that breaks down: You’ll need about 16 board feet of 4×4 stock for the legs and armrests, which form the structural backbone of your sofa. The frame rails require roughly 20 board feet of 2×4 stock, while the seat and back slats use about 12 board feet of 1×4 boards. Don’t forget the 4 board feet of 2×2 stock for internal supports and bracing.
Always order 10-15% extra lumber beyond your calculated needs. Teak boards can have natural defects, and even experienced builders make occasional cutting mistakes. With Grade-A teak costing $15-25 per board foot, your total material investment will range from $600-$1,250 for a quality build.
One builder recently told me: “I ordered exactly what my cut list showed, then finded a knot right where I needed a clean joint. Having extra boards saved my weekend project!”
What finish keeps teak golden instead of gray?
This question touches on one of teak’s most distinctive characteristics. Many people love the warm honey color of fresh teak but worry about the natural silvering that occurs outdoors.
Teak oil or specialized golden teak stains will maintain that rich, warm color you’re after. These finishes penetrate the wood and improve the natural grain beautifully. However, they require annual reapplication and regular cleaning to maintain their appearance.
For maximum protection with less maintenance, clear spar urethane offers an excellent compromise. It provides superior weather protection while allowing teak’s natural beauty to shine through. You’ll get 3-4 years between refinishing cycles instead of annual touch-ups.
Here’s something many DIYers don’t expect: letting teak weather naturally to silver-gray actually requires the least maintenance while showcasing the wood’s authentic character. An annual cleaning with teak cleaner keeps it looking fresh and beautiful. Many of our customers find they prefer this natural patina once they see it develop.
Can I build a sectional with the same plans?
Absolutely! Sectional designs use identical construction methods but add connection hardware between modules. This approach actually offers several advantages over building one massive piece.
Build each section as a standalone sofa first, then add corner brackets or connecting bolts to join them together. This modular approach makes moving much easier – trust me, you’ll appreciate this when it’s time to rearrange your patio or move to a new home.
Consider starting with a corner piece that has arms on two adjacent sides, then adding armless sections as your space and budget allow. This flexibility lets you adapt to different entertaining needs or seasonal arrangements.
One clever builder created a U-shaped sectional by building three separate pieces over several weekends. “I could use each piece as I finished it, then connect them all when the final section was complete. My family enjoyed the sofa throughout the whole build process!”
The connection hardware adds minimal cost but provides maximum flexibility for years to come.
Conclusion
Your diy outdoor teak sofa is more than furniture; it’s a cost-smart, long-lasting upgrade to your patio. Expect 50-75 % savings over retail and a custom fit that suits your exact space and style.
With minimal upkeep—just annual cleaning and the occasional finish touch-up—Grade-A teak can reward you with 25+ years of reliable service through every season of outdoor living.
At GOLDENTEAK we have spent over 25 years perfecting the same sustainable Grade-A teak and joinery methods described here. Visit our Massachusetts showroom or browse online to compare your work to our professionally crafted pieces.
Plan carefully, build with care, and your handcrafted sofa will provide decades of comfort and the lasting pride that comes from creating something beautiful yourself.